 |
| Have booklets, Can travel |
Almost every single rtw traveller is obsessed with the packing list, and not without reason. This is, after all, your only possessions when you travel for the next X number of months.
Generally, advices from websites are:
1. gather all the things you think you will need, half it and bring twice as much money.
2. bring the items that are not easily replaceable (e.g. specific medication) and if you have travelled before, the comfort items that you must have (e.g. your lucky tshirt). Anything else, you can buy (refer to item 1).
In other words, it does seem that one can travel with only the little booklets and cards and nothing else. Unfortunately it is not the case - we do not own a bank and we are human beings who need their protections (think worst case scenario) and possessions (think electronic gadgets).
What type of items
I started the packing process 2 months before my departure by researching on what are required. I looked at where people have been, their corresponding packing list and their review on the original packing list (on what was added and what was discarded or sent home). These are then matched to the places which I think I would be going. The new items are added to an existing packing list which I started 15 years ago and have been constantly updating since.What brand of items
Next, I researched on what I had to buy by typing search words such as "how to choose a backpack" and "hyvent vs goretex review". Once I had some idea what to look out for, I go to the brand's website to check on the specifications (e.g. 100% fleece vs down) and the weight.
Sometimes, the more I checked, the more confused I became. It 'helped' that there were limitations as to what was recommended by users on the internet vs what was available in the shops at home. When I started shopping for the winter wear, it was already February in Singapore. There were no more cheap and good heattech items at Uniqlo and no more long sleeved thermal wear from Columbia. I then had the option to buy online from overseas, take what was best available in shops at home, borrow or not bring the item at all. Belinda offered to buy things in Australia when she went home. Wendy, Belinda and Poh Leng also offered me some of their items.
Sometimes, the more I checked, the more confused I became. It 'helped' that there were limitations as to what was recommended by users on the internet vs what was available in the shops at home. When I started shopping for the winter wear, it was already February in Singapore. There were no more cheap and good heattech items at Uniqlo and no more long sleeved thermal wear from Columbia. I then had the option to buy online from overseas, take what was best available in shops at home, borrow or not bring the item at all. Belinda offered to buy things in Australia when she went home. Wendy, Belinda and Poh Leng also offered me some of their items.
What I brought
I have listed what I have packed for the rtw trip eventually, which weighed a total of 26kg (19kg check-in and 7kg carry-on). I have listed the brands, and in some cases, the sizes and why I have chosen the items so that we could see how these items measured up during the trip. In no way am I endorsing the brands.

- Osprey Farpoint 70 (S/M)
- Osprey rain cover (medium)
- Tatonka Schutzsack (medium)
- 1 shoe bag
I did not choose a trolley bag because it would be too difficult to carry a trolley bag up and down stairs in train stations and neighbourhoods where lifts and escalators are not common or where roads are cobbled. Also, as I was going on trekking trips that lasted for more than a few days, a trolley bag will not make sense and I will naturally need a backpack to hold my gear.
I then chose a front loading backpack over a top loading one because I wanted to be able to unzip the bag and view everything I had inside the bag. Front loading bags can also be locked (although it is not of much use if one wants to slash the bag.) The downside to using a front loading backpack is that the zip is more vulnerable. I was worried from time to time when the seams and the zip looked like there were going to burst. Also, front loading backpacks are essentially city backpacks. They do not have as many loops and buckles for hiking gear such as ice axe if you intend to hook them on the outside of the bag while hiking.
The Osprey bag I have chosen is made up of a 52l main backpack with a detachable 15l daypack that can be zipped on the front of the main backpack or clipped on the harness of the main pack for added security. Being able to clip the day pack also means that one only has 2 harnesses and not 4. It also has straps inside and outside the main backpack to hold the bag together (and prevent it from bursting). The bag is really light (1.7kg, with optimal load of less than 18kg). The bag does not fit me perfectly - because I am short, the hip belt does not sit nicely on my hip. I made do with it because there are not many available options from other brands in Singapore (I am not keen on buying bags online because I am not sure of the fit).
The shoe bag held 3 pairs of footwear, socks (stuffed inside the shoes to protect the shoes), some toiletries and 1 book that I could not squeeze into the main backpack.
The main backpack and the shoe bag are thrown into the Tantonka Schutzsack (a cargo bag) for checking in. I had wanted to buy a pacsafe eXomesh to protect the backpack from being slashed. In the end I decided against it because it is expensive and weighs 1.5kg. I relied on the cargo bag to keep my backpack safe. On days that I went for long hiking trips, the cargo bag was used to hold the items that I left behind at the hotel's concierge.
 |
| I think I can fit into my bag |
Clothes
I knew I could not bring my whole wardrobe but neither did I want to bring only 1 change of clothes and do laundry every day. It also did not help that I needed clothes for summer and winter, for sports and the city, for mountains and the beach. The clothes also have to be quick dry and preferably, rain proof. Not easy huh?
- 3 singlets
- 1 nice top (for concerts)
- 1 wool top
- 1 cardigan
- 2 Uniqlo heat tech long-sleeved tops
- 2 The North Face warm base layer (top)
- 1 jeans (I refuse to go out in cargo pants that can be transformed into shorts)
- 2 Uniqlo heattech leggings
- 3 shorts (2 for city and 1 for sports)
- 1 skirt
- 1 summer dress
- 1 Nike cap
- 1 track suit
- 1 The North Face Mountain Light Triclimate jacket (Goretex + down 550)
- 1 The North Face Venture pants
- 1 Columbia beanie
- 1 The North Face balaclava
- 1 The North Face Triclimate Hyvent gloves
- 1 swimwear and goggles
- Undergarments
- 4 footwear (hiking boots, runners, black flats, flip-flops)
- 6 socks (short one for runners, woolly ones for winter, thermal liners for trekking and winter)
- 1 Sea to Summit drylite towel (small)
- 1 of Mum's tiny handkerchief
- 3 vacuum bags and 3 laundry nets, both from Daiso
- 1 bag for city/ school (not carrying daypack in the city as I feel unsafe that the bag is behind me)
- 1 sunglass
Some travellers advocate using compression sacks while others use packing cubes. I found vacuum bags and laundry nets that cost S$1 - S$2 each (10 times cheaper than compression bags and packing cubes) more cost effective and practical (They are good for organisation, weigh next to nothing and can be flattened or rolled up when not in use).
 |
| TNF triclimate jacket only takes up this much space (as pictured next to a beanie) |
Vacuum bags work best by using vacuum cleaners to remove air from the bag and compressing the content (in this case, clothes) at the same time. In the absence of a vacuum cleaner, one can sit on the item, roll the bag and squeeze out the air to compress the content.
One thing to note however, is how one uses the vacuum bags. Initially, I tried putting all 2kg of winter gear into 1 big vacuum bag. The final result was a slab that could not be 'compromised'. My sister then suggested splitting the items into 2 smaller vacuum bags. Although the total volume of the 2 smaller vacuum bags was the same as that of the 1 big vacuum bag, the smaller vacuum bags could be manoeuvred around the backpack easily in consideration of the final organisation of the contents in the backpack.
As my main backpack is small, after putting in 'structured' items such as the 2 hard slabs of winter clothes, the toiletries and the electronic gadgets, I was unable to squeeze packing cubes (which have fixed shapes) into my bag to keep my clothes organised. Consequently, I used the laundry nets to keep some the clothes together. Laundry nets are lightweight and when I did my laundry, the laundry nets were used to protect my laundry from falling apart easily.
 |
| Laundry net |

- 1 Apple MacBook Pro 13" laptop [to book flights, check emails etc. Has reasonable speed and a slotted optical drive (as opposed to external optical drive that competes for the same usb slots)]
- 1 Apple AirPort Express WiFi base station (to turn cable network into WiFi)
- 1 Western Digital Passport external hard drive (to back up my pictures in case my laptop fails or goes missing)
- 1 thumb drive (to share files with others)
- 1 Apple iPod Classic
- 1 iPhone, 1 Blackberry smart phones (1 for home number, 1 for local SIM)
- 1 additional earphone (for just in case I lose the current one I am using)
- 3 iPhone USB cables and 1 Blackberry USB
- 1 Canon Ixus 80IS camera, 3 batteries and battery charger
- 2 travel adaptors
- 1 kensington lock for the laptop
- 1 whistle
- 1 Energizer personal alarm with LED light
Medication/ first-aid kit

- Elastic bandage (5cm)
- Lots of plasters, blister plaster, alcohol swaps, cotton pads
- Benzamycin cream for pimples
- Hand sanitizer (Dettol)
- Water purification tablets (Aquatabs)
- Eye drops (Alcon)
- Dimenhydrinate (Novomin) for motion sickness
- Acetazolamide (Diamox) for acute mountain sickness
- Chlorpheniramine for cold
- Doxycycline (Doxyline) for malaria
- 保济丸 for diarrhoea
- 青龙膏 for everything
- 如意油 for everything
- Antihistamines for sneezing and running nose
- Paracetamol (Panadol) for everything
- Serratiopeptidase (Danzen) for sore throat
- Lozenge (Tussils 5)
- Mometasone Furoate (Elomet) for skin inflammation from eczema, insect bites
- Surgical spirit (Guardian)
- Tea tree oil antiseptic (Thursday Plantation)
- 1 tweezer
- 1 scissors
- Safety pins which also doubles up as clothes pegs
- 1 ear plug

- 1 shampoo
- 1 facial wash which doubles up as body wash
- 1 hand cream
- 1 QV cream and 1 Cetaphil Intensive Moisturising cream
- 1 Klorane dry shampoo with oat milk (used when I had no access to showers during trekking)
- 1 No Rinse moisturising body wash for trekking (never used eventually)
- 1 BioZ natural insect repellent stick for trekking (did not really work for me)
- 1 toothbrush
- 1 dental floss
- 1 toothpaste
- 1 comb
- 1 Ole Henricksen truth serum collagen booster, sheer transformation and invigorating night gel (for dry weather and air conditioning)
- 1 Nivea sun invisible protection transparent spray SPF 50 for trekking
- 1 nail polish remover
- 2 packets of wet wipes from Daiso for trekking
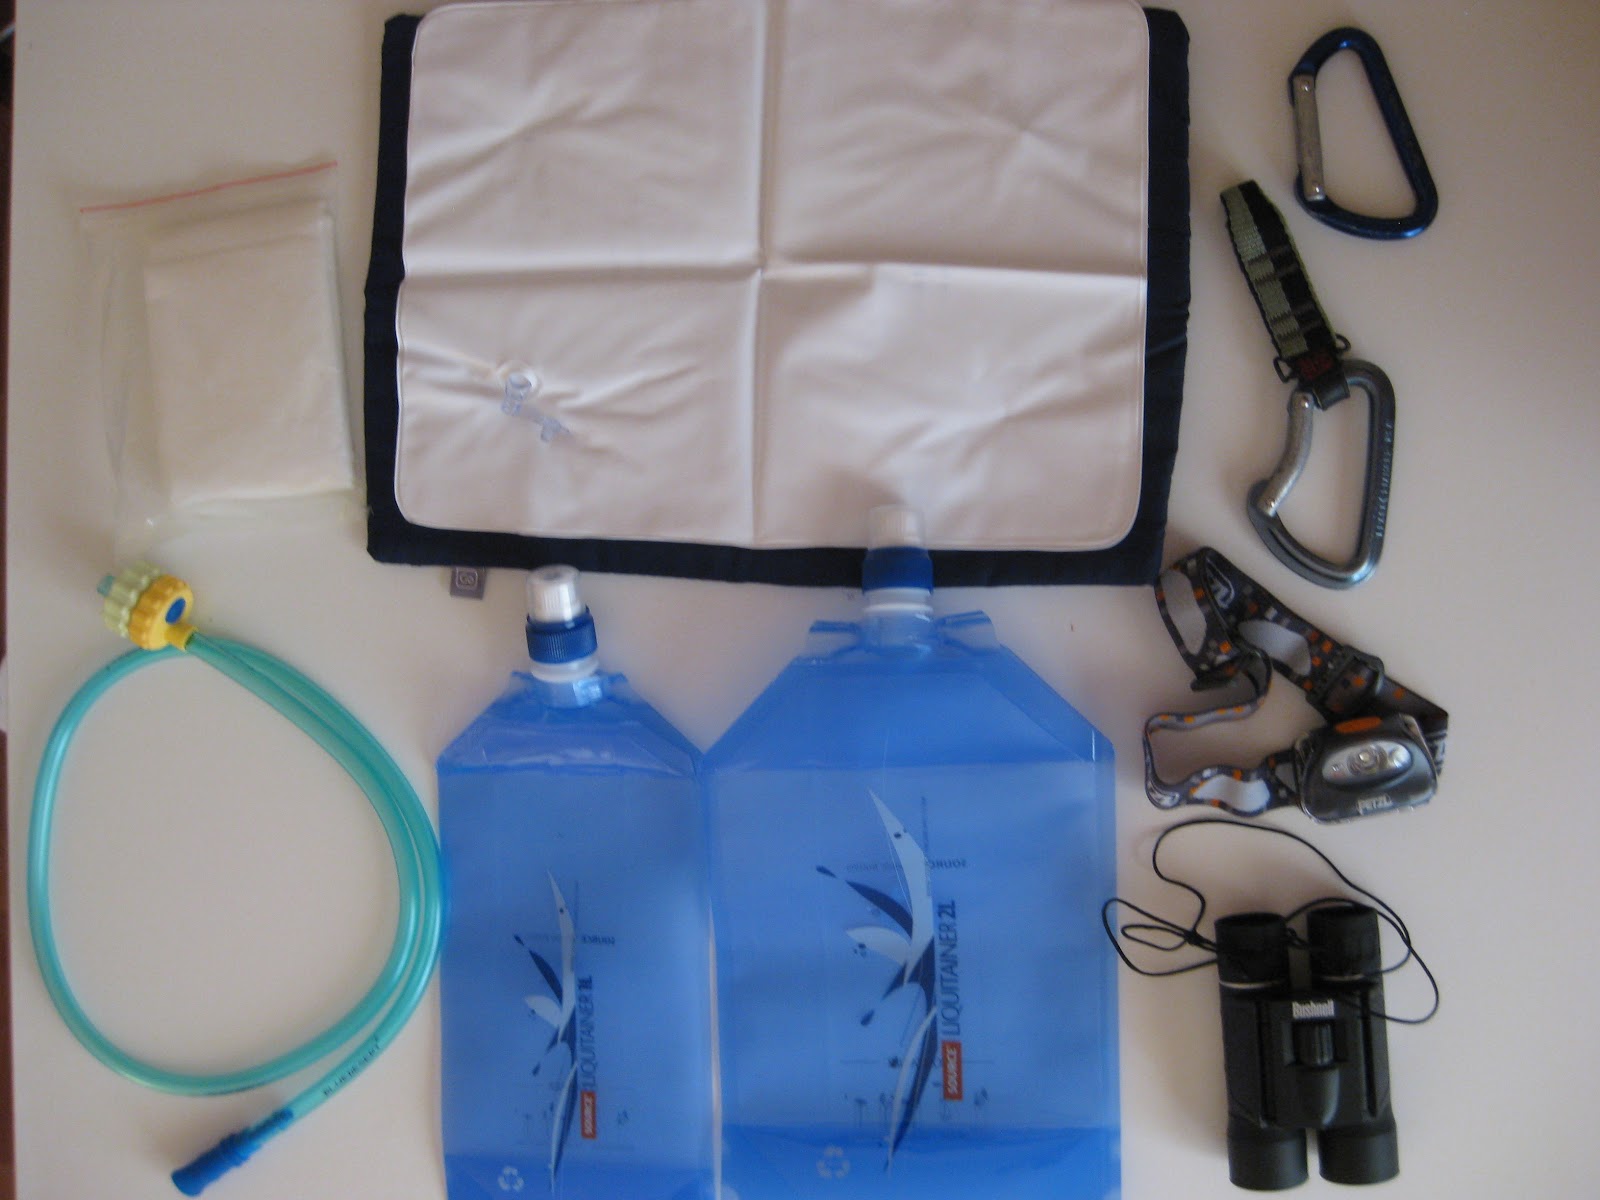
Camping gear
I only brought very basic personal camping gear for this trip and rented bulky and heavy items such as winter sleeping bags as and when I needed them.
- A 2l and a 1l liquitainer from Source
- 1 SmarTube
- 1 Bushnell 10x25 binoculars for animal spotting during safari, trekking and on boats
- 2 carabiner 'borrowed' from my brother who rock climbs. To attach items to the outside of backpack (e.g. to dry wet clothes while on the move) or on clothes line
- 1 Pretzl Tikka Plus 2 headlamp for trekking and reading on trains. I chose this model over the rest because it has both white light and red light (for use during night) and is cheaper than other brands
- 1 inflatable travel pillow (courtesy of Poh Leng)
- 1 disposable rain poncho
- 2 Japanese heat pad
- 2 thin metal clothes hangers and 5 pegs
- 1 S-shaped hook to hold my bag when there is no hook in toilets (I am very sure I do not want to set my bag on dirty toilet floors)
- 1 doorstop for the door (in case the door has no chain lock and I feel unsafe)
- 1 tiny umbrella for rainy cities
- 1 small set of cutlery (fork, spoon and chopsticks) to be used if I buy takeaway and cutlery not provided
- 1 tiny pencil case to hold 1 pen, 1 pen knife, 1 pencil for sketching, 1 magic tape

- 3 number combination locks (1 for day pack, 1 for backpack, 1 for cargo bag)
- some plastic bags and some rubber bands
- Photocopies of important documents (identification card, passport, driving license)
- Important documents (passport, identification card, driving license, international driving permit, vaccination booklet, credit and bank cards, travel insurance card)
What has broken down
I am happy to say that, except for most medication and the No Rinse moisturising body wash, I have used every single item that I have brought. These items, however, gave way:
- 1 of the liquitainers - one of the first things to break. The seam of the liquitainer was too closed to the edge and the pressure of the water forced a hole through and leaked water into my bag while I was climbing Mt Kili. (Tip: when buying a liquitainer, check the seam)
- Smartube. When I was summitting Mt Kili, despite blowing water back into the liquitainer, water somehow froze in the drinking tube. My guide tried to defrost it but accidentally broke it instead.
- 1 of the clothes hanger
- A screw of the sunglasses came off twice and I got it fixed for free in London even though I did not buy the sunglasses there (thanks Vision Express!)
- Seam of my cargo bag tore and I managed to get it fixed in Galápagos in US$1
- 1 tshirt tore
- clasp of cap broke
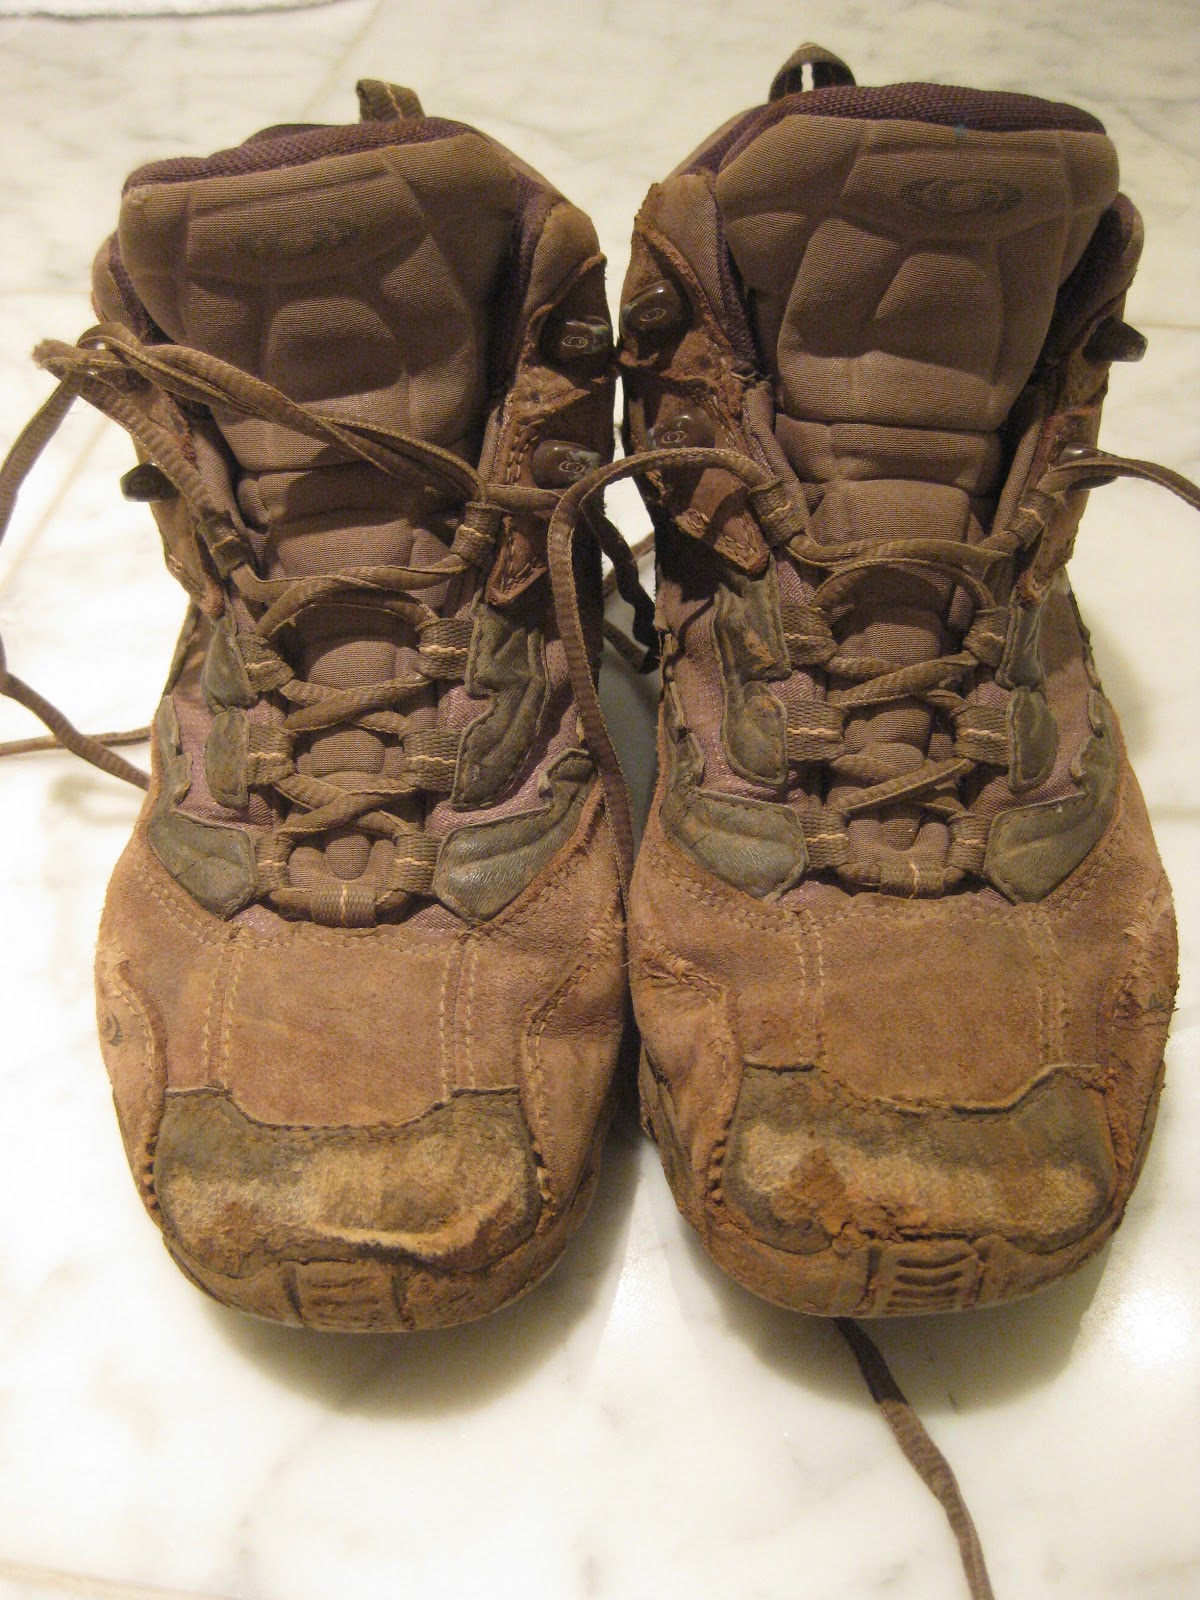
I threw away my trekking shoes on the last day of my trip. The toe caps and heels were very worn out and stunk big time.
 |
| My very abused shoes |
What I have since bought
One of the sad things of long term travelling was that I had to watch how I spend my money very closely and that essentially meant that I could not go girly shopping. Instead, I could only take pleasure in buying things like toiletries and to replace things that have broken down.
Kirk used it to tape his shoes when they failed him:

- Prepaid sim cards in Spain and UK
- 1 LG prepaid mobile phone in the USA (I could not find prepaid sim cards and the prepaid mobile phone which came with US$30 credit only cost US$45 from Kmart)
- 1 nail strenghtener for my nails (because they can break or chip easily while traveling) and to mend holes in stockings and bags
- 1 silk sleeping bag liner which is light and super compact. 1 costs S$250 in Singapore and I bought 1 for less than half this price in France
- 1 Mammut Goretex trekking pants for trekking on glacier on Haute Route
- 1 Mammut Goretex gaiter
- 1 pair of Leki thermolite trekking poles
- 1 sleeping bag and 1 inflatable mattress in Kenya because they could not be rented cheaply for my overland camping trip. I mailed them home after the overland trip because they were really really too expensive to be donated.
- 1 2l Source water bladder for trekking. This one lasted for the rest of the trip and is easy to clean and fill up.
- 1 sunglasses
- 2 tshirts
- 2 caps because 1 broke and 1 was lost
- 1 Johnson & Johnson Sundown aqua, UVA, UVB SPF60 sun screen for snorkelling. The most expensive sun screen that I had ever paid for in my whole life and was purchased in Galápagos.
- more socks
- more wet wipes and toiletries
- more medication to fix my huge blisters and infections: Compeed blister plasters, Dermaplus hydro plaster, Dermaplast Telfa Kompressen (5x7.5cm), 3M Medipore H Klebevlies (5x5cm), Ibonurofen (painkiller). I needed them when I did not have them and did not need them after I have bought them. Bugger!
What I would have also brought
I think a backpacker's best friend is probably the duct tape. I have seen duct tape being used on torn down jacket, torn tents, backpacks etc. The guys used duct tape to hold my rain cover to my bag. |
| I think I looked like a tortoise |

You don't have to bring a whole roll of duct tape (although in the case of Kirk, he had to keep replacing the worn out tape because he was trekking). Just tape some tape on a pen or pencil and you would have had yourself insured.


